
Raise & receive a purchase order
Order materials from a supplier and record what arrives.
What this is for
A purchase order is your formal order to a supplier. Raising one in Sign OS tracks what you have on order, sends the supplier a branded PO, and lets you receive stock against it when it arrives — so buying is joined up with your jobs and accounting.
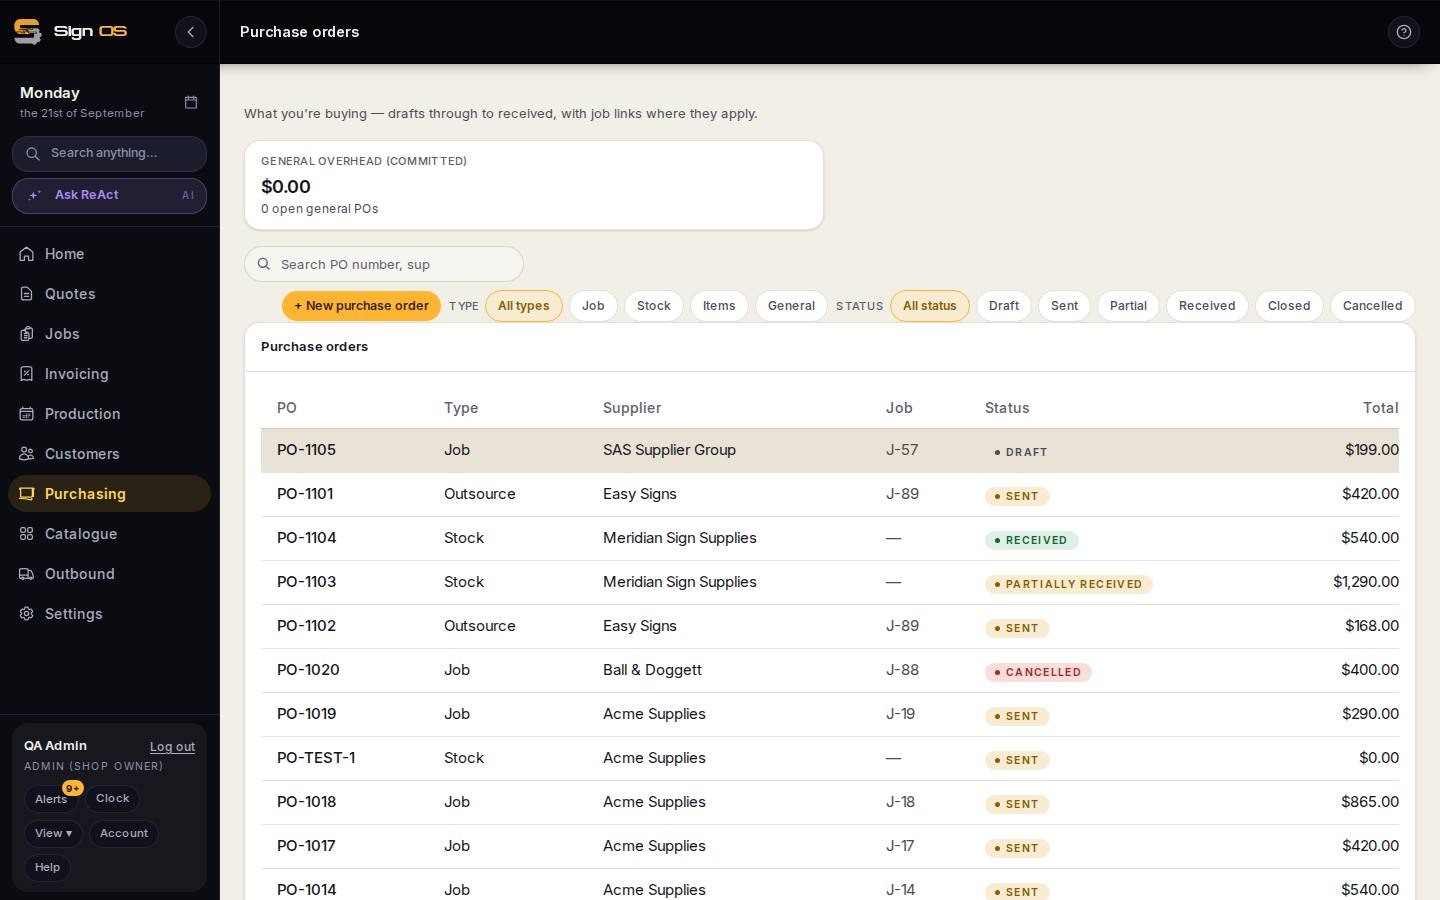
What is on this screen
Each part of the screen above, top to bottom, and what changing it affects.
Purchase orders list
- General overhead (committed)
- The total of open General POs.
- + New purchase order
- Opens the wizard: Type → Header → Lines → Review.
- Type · Status filters
- Job, Stock, Items, General, Outsource; Draft, Sent, Partial, Received, Closed, Cancelled.
- PO · Type · Supplier · Job · Status · Total
- Every order; click to open.
The wizard
- Type — Job · Stock · Items · General · Outsource
- Project purchases for back-costing; sheet, roll and media replenishment; hardware and consumables; overhead and maintenance; production work sent to a supplier.
- Header — Supplier · Job · Required by
- Who, which job (for Job and Outsource types), and when you need it.
- Lines
- Items, quantities (stock units and buying units), unit costs, an expense category on a General PO.
- Review · Save draft
- Check it, then save. Sending is a separate step on the order.
A purchase order
- Header — supplier · dates · status · revision
- Where it is up to; the revision number rises on every amendment and prints on the PDF.
- Send to supplier · PDF · email
- Sending emails the branded PO with a link the supplier can confirm on.
- Record receipt · Undo receipt · Close short · Split to backorder
- What arrived and what to do about the rest.
- Check goods · Add supplier invoice
- Inspection, and the supplier's bill against the order.
- Amend · Reissue · Cancel
- Change, replace or stop it.
- History
- Every event, who and when.
Before you start
- Your suppliers and the materials/items you buy are set up.
Step by step
- 1
Open Purchasing → Purchase orders and click + New purchase order.
- 2
Pick the order type — Job, Stock, Items, or General — then choose the supplier and set the order and required-by dates.
- 3
Add your order lines with quantities and unit costs, then click Save draft. (General POs let you tag each line with an expense category.)
- 4
Open the saved PO and click Send to supplier. Use the PDF and email buttons to download or send it a branded copy.
- 5
When the goods arrive, click Record receipt on the PO and enter what came in.
- 6
Where you need to send a step out rather than buy a material, see Send a job step out to a supplier.
Tips & gotchas
- Raise a Job PO so the spend links straight to the job for back-costing.
- Recording receipts keeps your on-order and received quantities honest — do it as deliveries land.
- A sent order is not frozen — it can be amended, reissued or cancelled, and the supplier is told.
- The expense categories on a General PO, sign-off before an order goes out, and whether cancelling emails the supplier are set on Purchasing → Purchasing settings.