
Build your online store
A public store page for your shop, built without code, published when you say.
What this is for
Your online store is a public page where customers see your work and order the products you choose to sell there. You build it from sections — a welcome banner, about, gallery, products, contact — pick a look and a layout, and edits stay in draft until you publish, so you can work on it without customers seeing half a page.
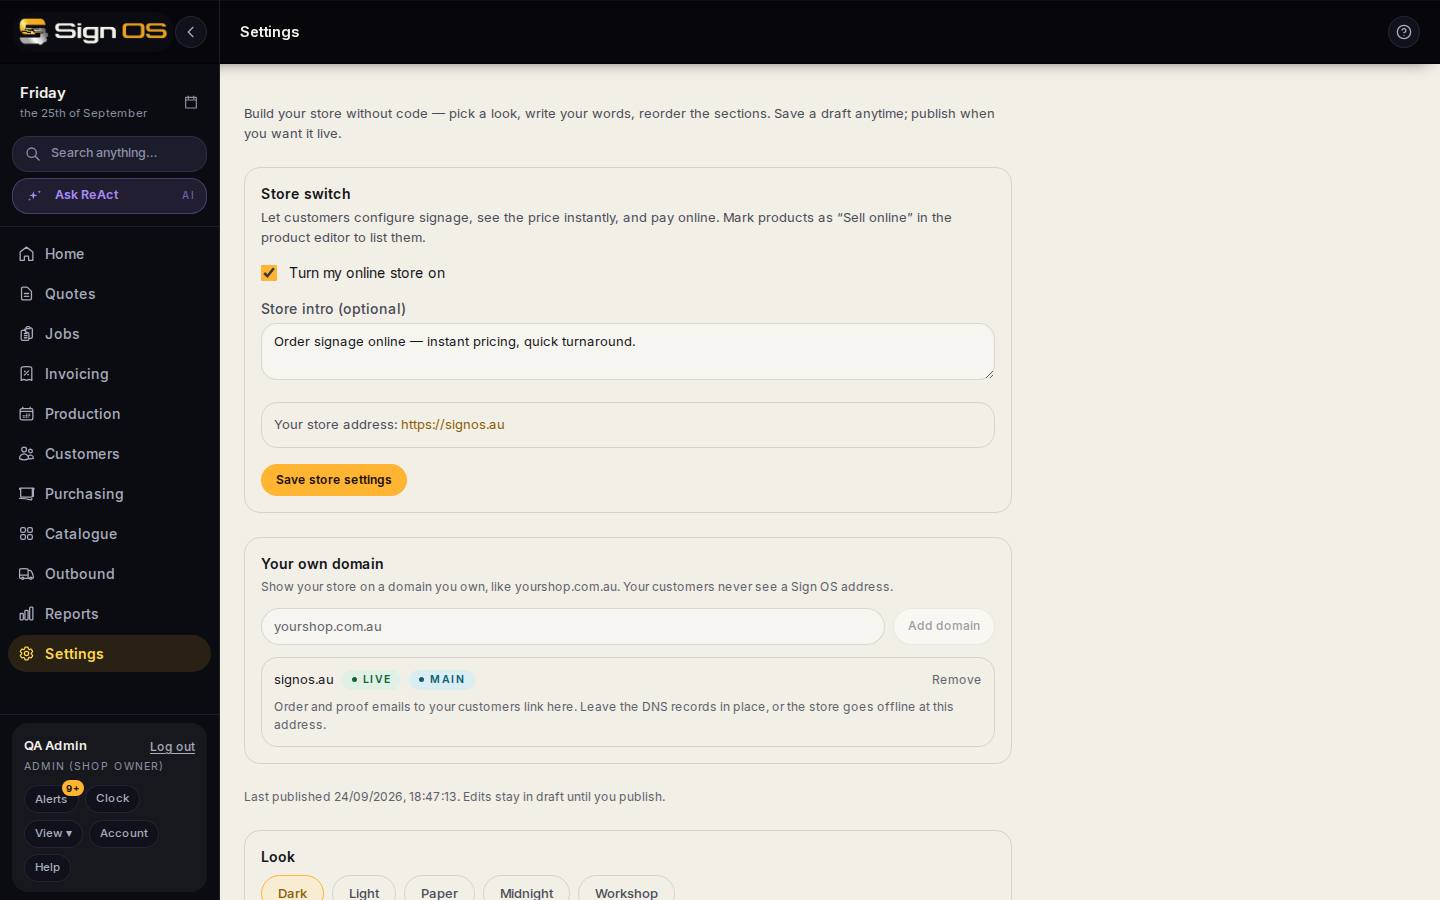
What is on this screen
Each part of the screen above, top to bottom, and what changing it affects.
Store switch (top card)
- Turn my online store on
- Opens the store to the public. Off, the address shows nothing and no orders can come in.
- Store intro
- An optional welcome line at the top of the store.
- Your store address
- Shown once the store is on. Your own domain once one is live, otherwise the Sign OS address.
- Save store settings
- Saves the switch and intro straight away. These do not wait for Publish.
Your own domain
- Domain box · Add domain
- Type an address you own, like store.yourshop.com.au. You can add more than one.
- Ownership · Routing · Cert · Live badges
- Where each domain is up to. Amber is waiting, green is done, red needs fixing.
- Add these two records
- The TXT and CNAME records to add wherever your domain is managed. The TXT proves it is yours; the CNAME sends visitors to your store.
- Check ownership · Make primary · Remove
- Check looks for the records. Primary is the address customers and approval links use when you have more than one.
Store builder
- Last published · draft state
- Edits stay in draft until you publish.
- Look — Dark · Light · Paper · Midnight · Workshop
- The starting palette. Your store's colours below sit on top of it.
- Your store's colours — Button colour · Page background · Cards · Top bar, footer & reviews band · Logo background
- The store's own colours, separate from Appearance, so the store can look different to Sign OS. You pick the surfaces; text colours are worked out from them and checked so they stay readable. Leave any blank to keep the Look. Button colour and Logo background follow Appearance until you set them here.
- Preview
- A small picture of the store in the colours you have picked. Publish to put them on the live store.
- Layout — Showcase · Catalogue · Local
- What the page leads with: your work, prices, or your phone number. Changing it reorders the page.
- Lettering — Trade · Sign OS
- The typeface family.
- Welcome banner — banner picture · description · buttons · ticked points
- The top of the page.
- About section · About picture
- Your workshop, crew, van.
- Gallery
- Only your own work; empty until you add pictures.
- Section order · Footer line
- Drag sections; a line at the bottom.
- Your business details
- Read-only: the registered name and ABN your store footer prints, taken from Business details so they match your quotes and invoices. The link takes you there to change them.
- Save draft · Publish
- Save keeps working; Publish makes it live.
Before you start
- Set your logo and details under Settings → Your business → Business details first; the store uses them.
- Tick 'Sell this product on your online store' on each product that should appear.
Step by step
- 1
Open Settings → Online store. Tick Turn my online store on and Save store settings when you are ready for customers to see it.
- 2
Want it on your own address? Under Your own domain, type it and click Add domain, add the two records wherever your domain is managed, then Check ownership until it goes green.
- 3
In the builder, the top says when it was last published; edits stay in draft until you publish again.
- 4
Look: Dark, Light, Paper, Midnight or Workshop. Then Your store's colours if you want the store in its own colours: button, page background, cards, the top bar and footer, and the plate behind your logo. Layout: Showcase leads with your work, Catalogue leads with prices, Local leads with your phone number. Lettering: Trade or Sign OS.
- 5
Welcome banner: a wide photo of your own work as the banner picture, a headline, buttons, and ticked points under the buttons. Describe each picture for screen readers and search engines.
- 6
About section: a picture of your workshop, your crew, your van, and your words. Gallery: only your own work — it stays empty until you add pictures.
- 7
Reorder the sections, save a draft any time, and publish when you want it live. Orders placed there arrive in Web orders.
Tips & gotchas
- A gallery of stock photos is the fastest way to lose a customer's trust. Six real jobs beat sixty perfect ones.
- The store's address is shown at the top of Web orders — put it on your email signature and your van.