
Set up install contractors
Manage the third-party installers who fit your signs.
What this is for
Install contractors are the outside crews who install your work. Setting them up lets you assign them to jobs and share what they need, so installs are organised instead of a string of phone calls.
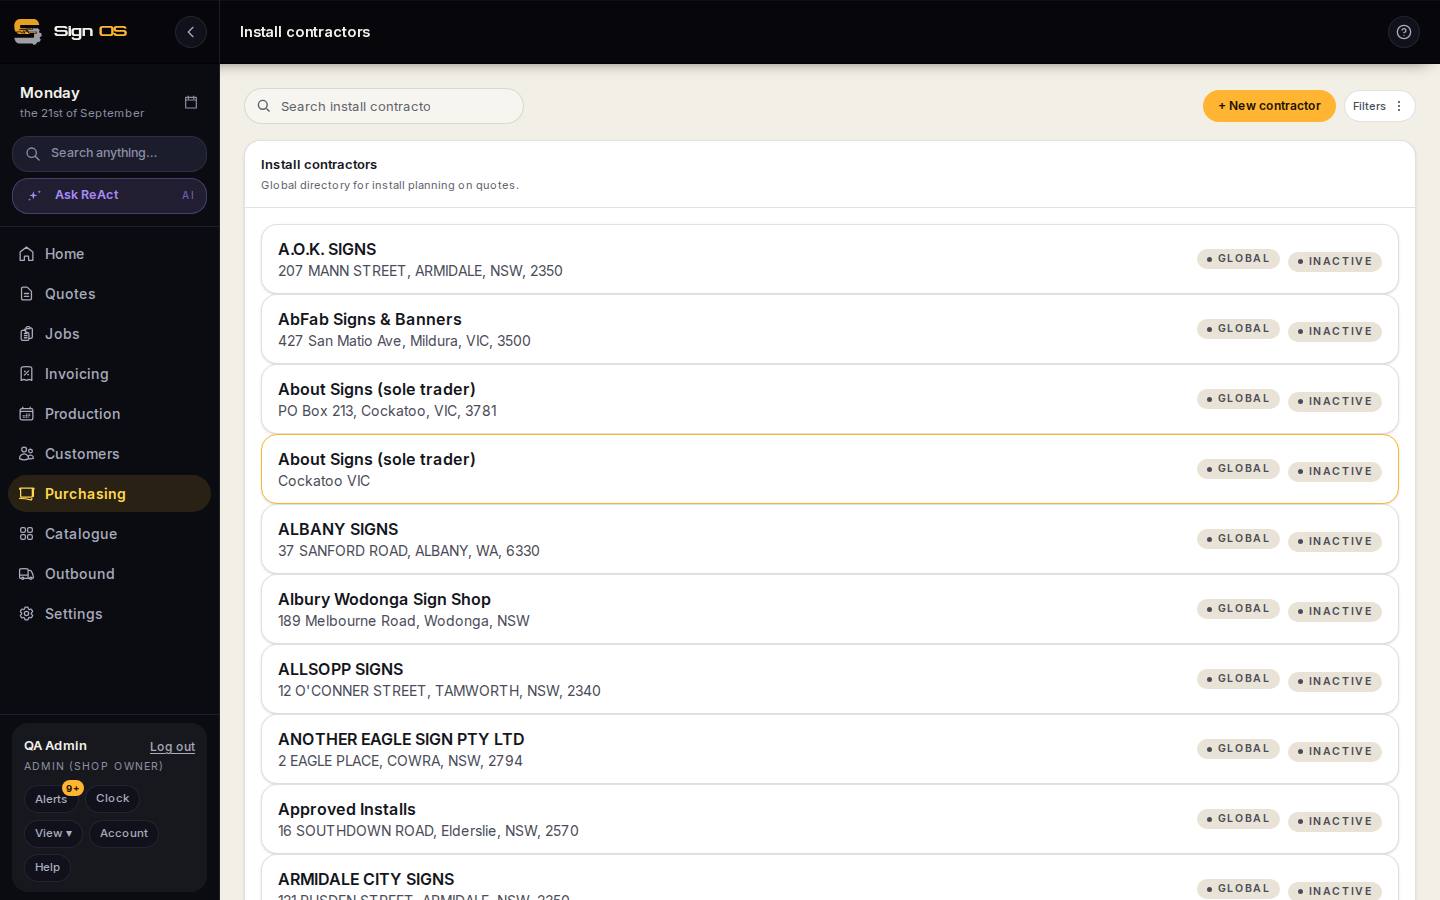
What is on this screen
Each part of the screen above, top to bottom, and what changing it affects.
Install contractors list
- + New contractor · Filters
- Add one; filter by state or status.
- Card — name · address · GLOBAL / SHOP · ACTIVE / INACTIVE
- The shared directory plus your own. Inactive until compliance is current.
A contractor
- Trading name / Full name · Sole trader · location · state
- Who they are.
- Standard rate / hr · Night rate / hr
- What they charge; a Shop override keeps your own rates for a global contractor.
- Compliance
- Public liability and workers comp — approved and current makes them Active.
- Reviews
- Your rating and notes after a job.
- Portal access — Send portal invite
- Their login to the installer portal.
Before you start
- You are signed in with the right access to manage contractors.
Step by step
- 1
Open Purchasing → Install contractors and click + New contractor.
- 2
Fill in their trading name (or full name for a sole trader), location and state, their Standard and Night rate per hour, and contact details, then save. A contractor stays Inactive until their public liability and workers comp are approved and current — that is the Compliance panel on their page.
- 3
From then on you can pick the contractor when you plan an install on a quote. The list is a global directory shared across shops; a contractor you add is yours, and a Shop override lets you keep your own rates for a global one.
- 4
Open the contractor and, under Portal access, press Send portal invite to give them a login to the installer portal.
Tips & gotchas
- Contractors only ever see the jobs you assign them through the portal — never your wider job or pricing data.